A Definitive Guide to Wiping SSD Drives for Enterprises

Wiping an SSD isn't like wiping an old-school hard drive. If you're still using traditional overwriting tools, you're almost certainly leaving sensitive data behind and creating a massive security risk. This isn't a minor oversight; it's a fundamental misunderstanding of how modern solid-state drives are built.
Why Wiping SSD Drives Is Fundamentally Different
Treating an SSD like a traditional HDD during IT asset disposition is a dangerous and potentially expensive mistake. The core of the problem comes down to the architecture—the difference between spinning magnetic platters and the sophisticated NAND flash memory that powers an SSD.
Unlike an HDD where data is written to a predictable, fixed physical location, an SSD’s controller is constantly shuffling data around behind the scenes. It does this to preserve the drive's lifespan, but it creates blind spots that most legacy wiping software can't see or touch.
The Challenge of Wear-Leveling
Every single memory cell in an SSD has a limited number of write cycles before it wears out. To prevent parts of the drive from failing prematurely, the firmware uses a clever process called wear-leveling. This algorithm intelligently spreads write operations evenly across all the available memory blocks.
So, when you command a tool to "overwrite" a file, the SSD controller might not put the new data in the same physical spot. Instead, it often just marks the original blocks as invalid and writes the new data to a fresher, less-used block. That old, sensitive data is still physically there, waiting for the drive's internal garbage collection to maybe, eventually, get around to clearing it—which might not happen before the drive leaves your control.
Key Takeaway: A standard overwrite command doesn't guarantee the original data is physically gone. The SSD controller has the final say, and it will often leave the original data intact while making it invisible to the operating system.
Over-Provisioning Hides Data from Wiping Tools
SSD manufacturers intentionally reserve a portion of the drive's total storage capacity for internal management. This hidden area, known as over-provisioning, is completely invisible to your operating system and can be anywhere from 7-25% of the drive's total size. The controller uses this space for wear-leveling, garbage collection, and managing bad blocks.
Your standard wiping software can't touch this hidden space. This means copies of files and sensitive data fragments can easily survive in these over-provisioned blocks, long after you thought the drive was clean. Forensic tools, however, can often access and piece together this "hidden" data.
SSDs rely on NAND flash memory, where these internal mechanics can leave up to 7-10% of data remnants behind after a standard overwrite. One eye-opening 2018 study found that conventional tools allowed for the recovery of 90% of files from "wiped" consumer SSDs. In contrast, enterprise-grade solutions using ATA Secure Erase slashed that recoverable data down to less than 0.1%.
HDD Wiping vs SSD Wiping Key Differences
It's crucial to understand why the methods that worked for years on HDDs are completely inadequate for SSDs. This table breaks down the fundamental differences at a high level.
| Attribute | Traditional HDD Wiping (Overwrite) | Secure SSD Wiping (Sanitization) |
|---|---|---|
| Data Storage | Magnetic platters with fixed sectors. | NAND flash memory with dynamic blocks. |
| Write Process | Data is written to a specific, direct location. | Controller decides where data is written (wear-leveling). |
| Hidden Areas | None (all sectors are accessible). | Over-provisioned space is hidden from the OS. |
| Wiping Efficacy | High. Overwriting a sector destroys old data. | Low. Overwriting may not erase the original data cells. |
| Primary Risk | Incomplete wipe (e.g., missing a partition). | Data remnants in over-provisioned or wear-leveled blocks. |
Simply put, you cannot trust old hard drive wiping techniques on modern storage. The risks are just too high.
Garbage Collection and Trim Commands
The TRIM command is a helpful feature where the operating system tells the SSD which blocks of data are no longer needed. This helps the drive run efficiently, but it is not a security tool. The drive's controller decides when—or even if—to execute these commands, and it's not instantaneous.
Similarly, garbage collection is the SSD's internal housekeeping process for clearing out those invalid data blocks we talked about. Relying on these routine functions for data security is like leaving your front door unlocked and hoping no one walks in. There's no way to verify that your specific sensitive data has been permanently destroyed.
You can dig deeper into these distinctions in our guide on how to wipe a hard drive completely. Securely sanitizing an SSD requires methods that communicate directly with the drive's own firmware, bypassing these unpredictable internal processes entirely.
Choosing the Right SSD Sanitization Method
When it comes to wiping SSDs, you have to forget everything you learned from old-school hard drives. Traditional overwrite methods just don't work here. The goal isn't to write meaningless data over the top; it's to communicate directly with the drive's own firmware and tell it to reset itself.
This approach is the only way to ensure every single memory cell—including those tucked away in hidden over-provisioned areas—is properly cleared. Your choice of method will come down to the drive's interface (SATA vs. NVMe), its specific features, and your organization's security policies.
This flowchart breaks down exactly why those old HDD wiping tools fail on modern SSDs, often leaving sensitive data recoverable.
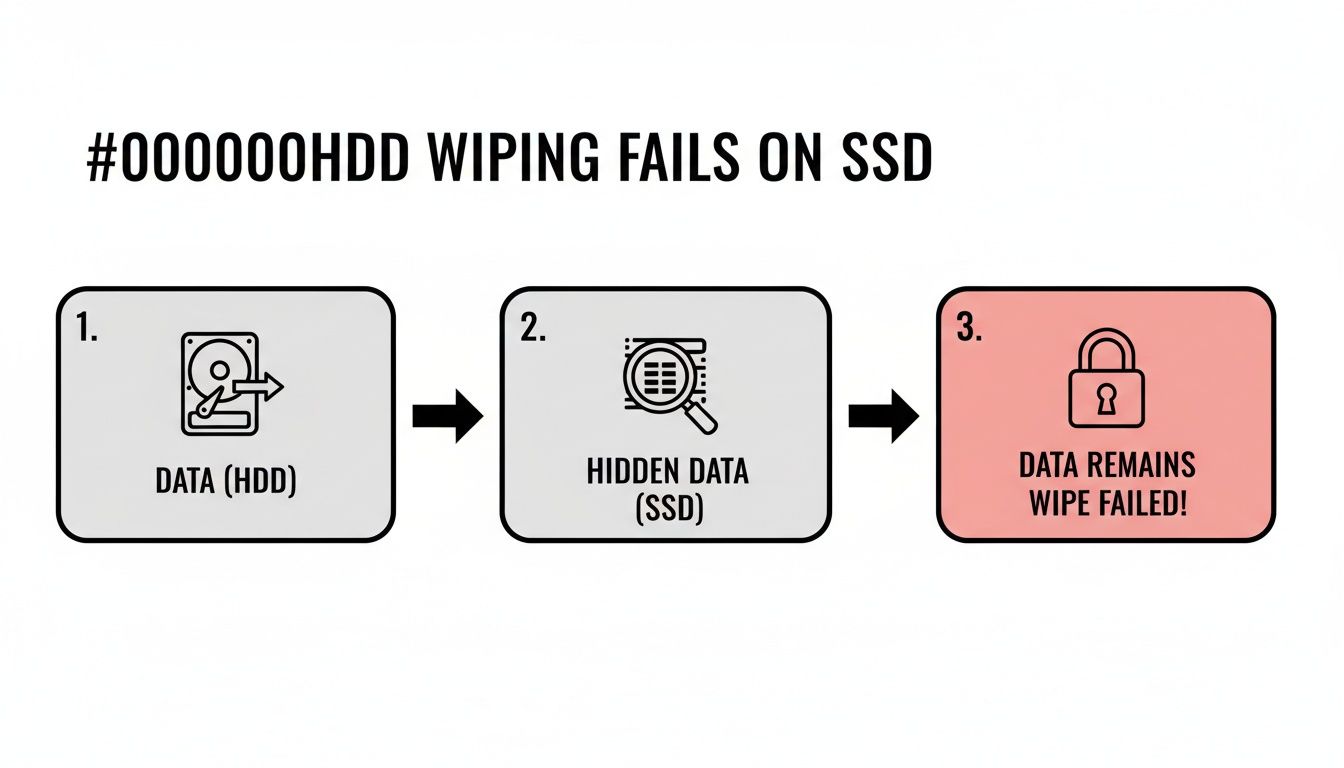
As you can see, the drive's internal wear-leveling and over-provisioning mechanics are the culprits, creating data persistence issues that legacy software can't even see, let alone fix.
ATA Secure Erase for SATA Drives
For any SATA-based SSD, the ATA Secure Erase command is the undisputed gold standard. This isn't software; it's a command built directly into the drive’s firmware that functions like a master reset switch.
When you execute it, the drive's controller hits every NAND flash block with a voltage spike. This resets them all to their original, empty factory state. It's a clean, complete electronic reset—not an overwrite. It’s fast, incredibly effective, and sidesteps all the problems of wear-leveling by targeting the entire physical media at once.
NVMe Secure Erase and Format
Modern NVMe drives have their own equivalent designed for the PCIe interface: the NVMe Format command. It serves the same purpose as its SATA counterpart, communicating directly with the drive's controller to perform a low-level format that clears all user data.
This is a powerful and direct way to sanitize NVMe media, ensuring a complete wipe that aligns with NIST standards.
The Power of Cryptographic Erase
By far the fastest and most elegant solution is Cryptographic Erase (Crypto Erase). This method is only available on Self-Encrypting Drives (SEDs), which are now common in enterprise hardware. These drives encrypt everything written to them by default using a hardware encryption engine and a unique key stored on the drive itself.
You never notice it's happening, but all the data is constantly encrypted.
Wiping the drive becomes almost instant: you just delete the encryption key. Once the key is gone, the data on the drive becomes a permanently inaccessible jumble of ciphertext. The process takes mere seconds, regardless of the drive's capacity. For any of the IT asset disposition companies managing thousands of drives, this method is a game-changer.
To help you decide which method is right for your workflow, here’s a quick comparison of the top three approved techniques.
SSD Sanitization Method Comparison
| Method | Effectiveness | Speed | Best For | Key Consideration |
|---|---|---|---|---|
| ATA Secure Erase | Very High – Resets all cells to factory state, clearing over-provisioned areas. NIST 800-88 compliant. | Fast – Typically under 2 minutes for a 1 TB SATA SSD. | All SATA-based SSDs that support the firmware command. | Drive must not be in a "frozen" security state, which sometimes requires a power cycle to unlock. |
| NVMe Format | Very High – Direct firmware command to erase all user data. NIST 800-88 compliant. | Very Fast – Often faster than ATA Secure Erase due to the PCIe interface. | All modern NVMe SSDs in servers, workstations, and high-end laptops. | Requires specific command-line tools (like nvme-cli) or enterprise software that supports the NVMe protocol. |
| Cryptographic Erase | Instant & Absolute – Renders data irrecoverable by destroying the encryption key. NIST 800-88 compliant. | Instant – A few seconds, regardless of drive size. | Self-Encrypting Drives (SEDs), common in enterprise-grade hardware. Ideal for large-scale ITAD. | The drive must be a Self-Encrypting Drive (SED). Not all drives support this feature. |
Ultimately, choosing a firmware-based command like Secure Erase or Crypto Erase is the only way to guarantee complete data destruction on an SSD, ensuring your ITAD process is both secure and compliant.
How to Verify and Document SSD Wiping
Running a Secure Erase command is a great start, but it's only half the job. Without ironclad verification and documentation, you have no real proof the data is gone. This isn't just about peace of mind—it's about building a defensible record to stand up to audits, compliance checks, and any legal questions that might come up later. Just seeing an empty drive in your file explorer isn't nearly enough.
The real work begins after the wipe. A successful SSD sanitization process isn't complete until you have a verifiable, audit-proof record for every single asset that leaves your control.
Beyond a Simple Visual Check
After you run a firmware-level command like ATA Secure Erase or NVMe Format, the drive will appear completely empty to the operating system. It's a good first sign, but it’s not proof of sanitization. The goal is to confirm the underlying physical sectors are actually zeroed out, not just that the partition table was wiped clean.
To do that, you have to dig deeper. Specialized tools are needed to read the raw, sector-by-sector contents of the drive.
- Sector-Level Analysis: Use a tool that can perform a hexadecimal dump of the drive. You should see nothing but a uniform pattern, typically all zeros (0x00) or all Fs (0xFF), across every accessible part of the drive.
- Spot-Checking: Randomly sample different sectors—at the beginning, middle, and end of the drive—to ensure that pattern is consistent. If you find any readable data fragments, the wipe failed or was incomplete.
This method gives you a much higher degree of confidence than just plugging in the drive to see if it's blank.
Using Hashing for Bit-for-Bit Verification
For the highest level of assurance, hashing is the industry standard. A cryptographic hash function like SHA-256 creates a unique digital fingerprint for any set of data. If even a single bit is different, the resulting hash will be completely unrecognizable from the original.
Here’s how you apply it in a verification workflow:
- Generate a Pre-Wipe Hash (Optional but Recommended): Before you do anything, you can hash the drive to create a baseline fingerprint of its original data.
- Generate a Post-Wipe Hash: After wiping the drive, perform a bit-for-bit read of the entire device and generate a new SHA-256 hash.
- Compare and Verify: A successfully wiped drive, filled with zeros, will always produce a specific, known hash value. You compare your post-wipe hash to this known "clean" value to confirm complete sanitization.
This process gives you mathematical proof that the drive's contents are exactly what they should be after a wipe. There's no ambiguity.
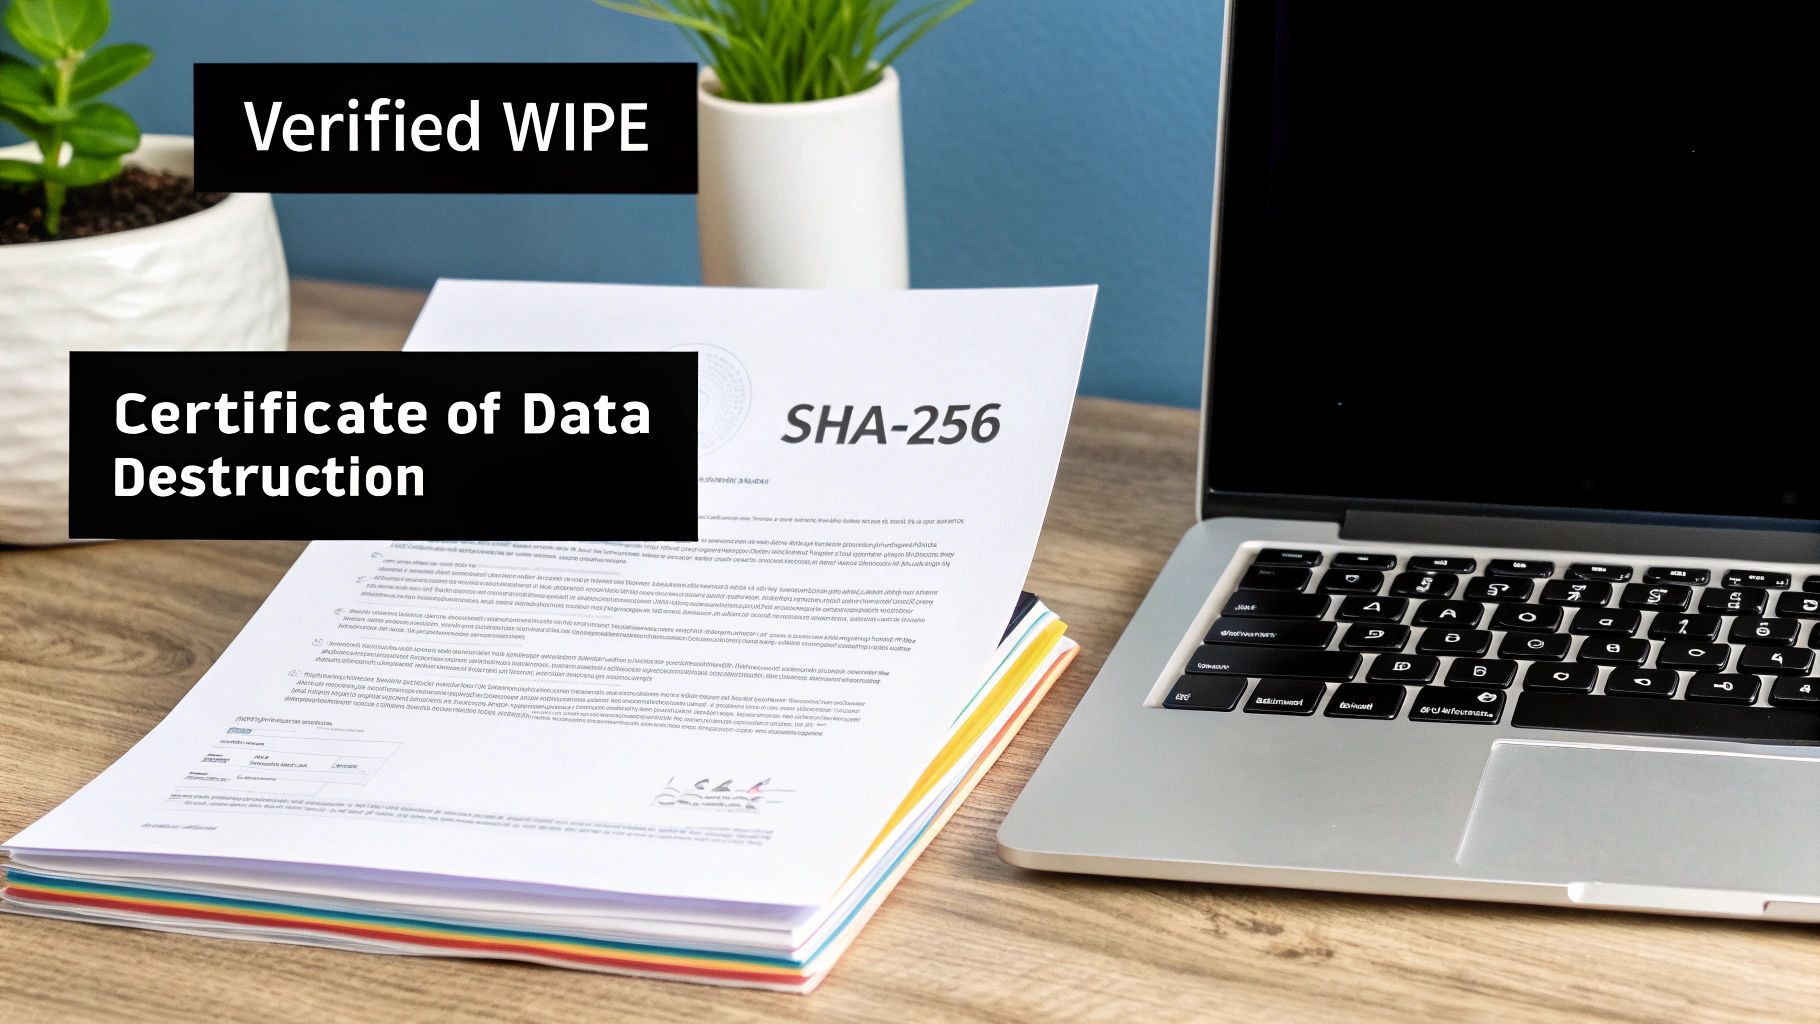
A successful wipe is meaningless without proof. A Certificate of Data Destruction backed by verifiable hash values transforms a technical process into a legally defensible record of due diligence.
The Certificate of Data Destruction
Every single asset you sanitize needs its own Certificate of Data Destruction (CoDD). This document is the cornerstone of your audit trail and the primary evidence you'll show to stakeholders, auditors, or legal teams. A proper CoDD is more than a simple receipt; it's a detailed report that chronicles the entire sanitization event for a specific device.
A compliant, audit-proof certificate must contain several key pieces of information to be considered valid.
Essential Elements of a CoDD
| Information Category | Specific Details to Include | Why It's Critical |
|---|---|---|
| Asset Identification | Serial Number, Manufacturer, Model, Asset Tag | Unambiguously links the certificate to a specific physical device. |
| Sanitization Details | Method Used (e.g., ATA Secure Erase, Crypto Erase), Software/Tool Used, Date & Time of Sanitization | Documents the technical process and establishes a clear timeline of events. |
| Verification Evidence | Post-Sanitization Hash (e.g., SHA-256), Verification Status (Pass/Fail) | Provides mathematical proof of successful data destruction. |
| Chain of Custody | Technician Name/ID, Location of Sanitization | Establishes accountability and tracks who handled the asset and when. |
This level of detail is non-negotiable for any organization handling sensitive data. For those looking for a partner to manage this process, you can explore more about certified IT asset disposition services in Dallas Fort Worth, Texas that provide these detailed reports as a standard part of their workflow.
By combining sector-level analysis, cryptographic hashing, and meticulous documentation, you create an unbreakable chain of evidence. This robust system ensures your SSD wiping process not only works but is also fully compliant and defensible.
Meeting Compliance Standards for Data Destruction
Running the right sanitization command is a technical win, but it's not the end of the story. For any business, wiping SSDs has to be grounded in the rules that govern your specific industry. If your technical workflow isn't aligned with these standards, you're not just creating a process gap—you're opening the door to serious financial and reputational harm.
The consequences are no joke. In North America and Europe, data breaches from improperly wiped SSDs now cost an average of $4.88 million. The problem is especially bad in the public sector, where the U.S. GAO found a 22% non-compliance rate in federal asset disposals. As a result, companies are scrambling to catch up. Today, 62% of enterprises formally require certified wiping in their ITAD contracts, a huge jump from just 34% in 2020, as they rush to meet frameworks like NIST, HIPAA, and R2. You can get more details on these trends by reviewing the full analysis on Coherent Market Insights.
Navigating the NIST 800-88 Framework
When it comes to data sanitization in the U.S., the National Institute of Standards and Technology (NIST) Special Publication 800-88 is the bible. It started as a government standard, but now it’s the go-to guide for private industry as well. It lays out three methods for getting rid of data:
- Clear: This involves using logical techniques to wipe data in all the places a user can access. A standard ATA Secure Erase command usually gets this job done.
- Purge: This is a bigger gun. It uses physical or logical methods to make data recovery impossible, even with state-of-the-art lab equipment. For SSDs, this means using ATA Secure Erase (Enhanced) or Cryptographic Erase.
- Destroy: Just like it sounds. This method renders the drive completely unusable by shredding, disintegrating, or incinerating it.
The official NIST SP 800-88 Rev. 1 publication includes a flowchart that helps break down the decision-making process.
The key takeaway is that your choice—Clear, Purge, or Destroy—depends entirely on how sensitive the data is and where that drive is headed after it leaves your building.
If you plan to reuse or resell SSDs, the NIST Purge standard is your target. It ensures the data is forensically unrecoverable, giving you top-tier security while preserving the asset's value.
Industry-Specific Compliance Scenarios
NIST tells you how to wipe a drive, but other regulations tell you why. You absolutely have to tailor your SSD wiping process to the rules that apply to your field.
HIPAA in Healthcare
The Health Insurance Portability and Accountability Act (HIPAA) is crystal clear: covered entities must have policies for the final disposition of electronic protected health information (ePHI).
- Scenario: A hospital is retiring a fleet of nursing workstations, all containing SSDs full of patient data.
- Compliance Action: That hospital can't just format the drives and call it a day—that's a direct violation. They have to sanitize the SSDs to the NIST Purge level before they can be resold or recycled. The entire process must be documented with a detailed certificate of destruction for hard drives for each and every drive, creating an audit trail that proves HIPAA compliance.
GDPR and Data Privacy
In Europe, the General Data Protection Regulation (GDPR) gives people the "right to be forgotten." This isn't just a suggestion; it means you have to be able to prove you've completely and permanently erased someone's data if they ask.
- Scenario: A Dallas-based cloud provider is decommissioning servers that processed data for its European customers.
- Compliance Action: To comply with GDPR, the provider must use a NIST Purge-level method like Cryptographic Erase or NVMe Format. This ensures the data is gone for good. Documenting this sanitization process is their proof that they've met their obligations, protecting them from massive fines that can reach up to 4% of their annual global turnover.
When to Sanitize vs. Physically Destroy an SSD
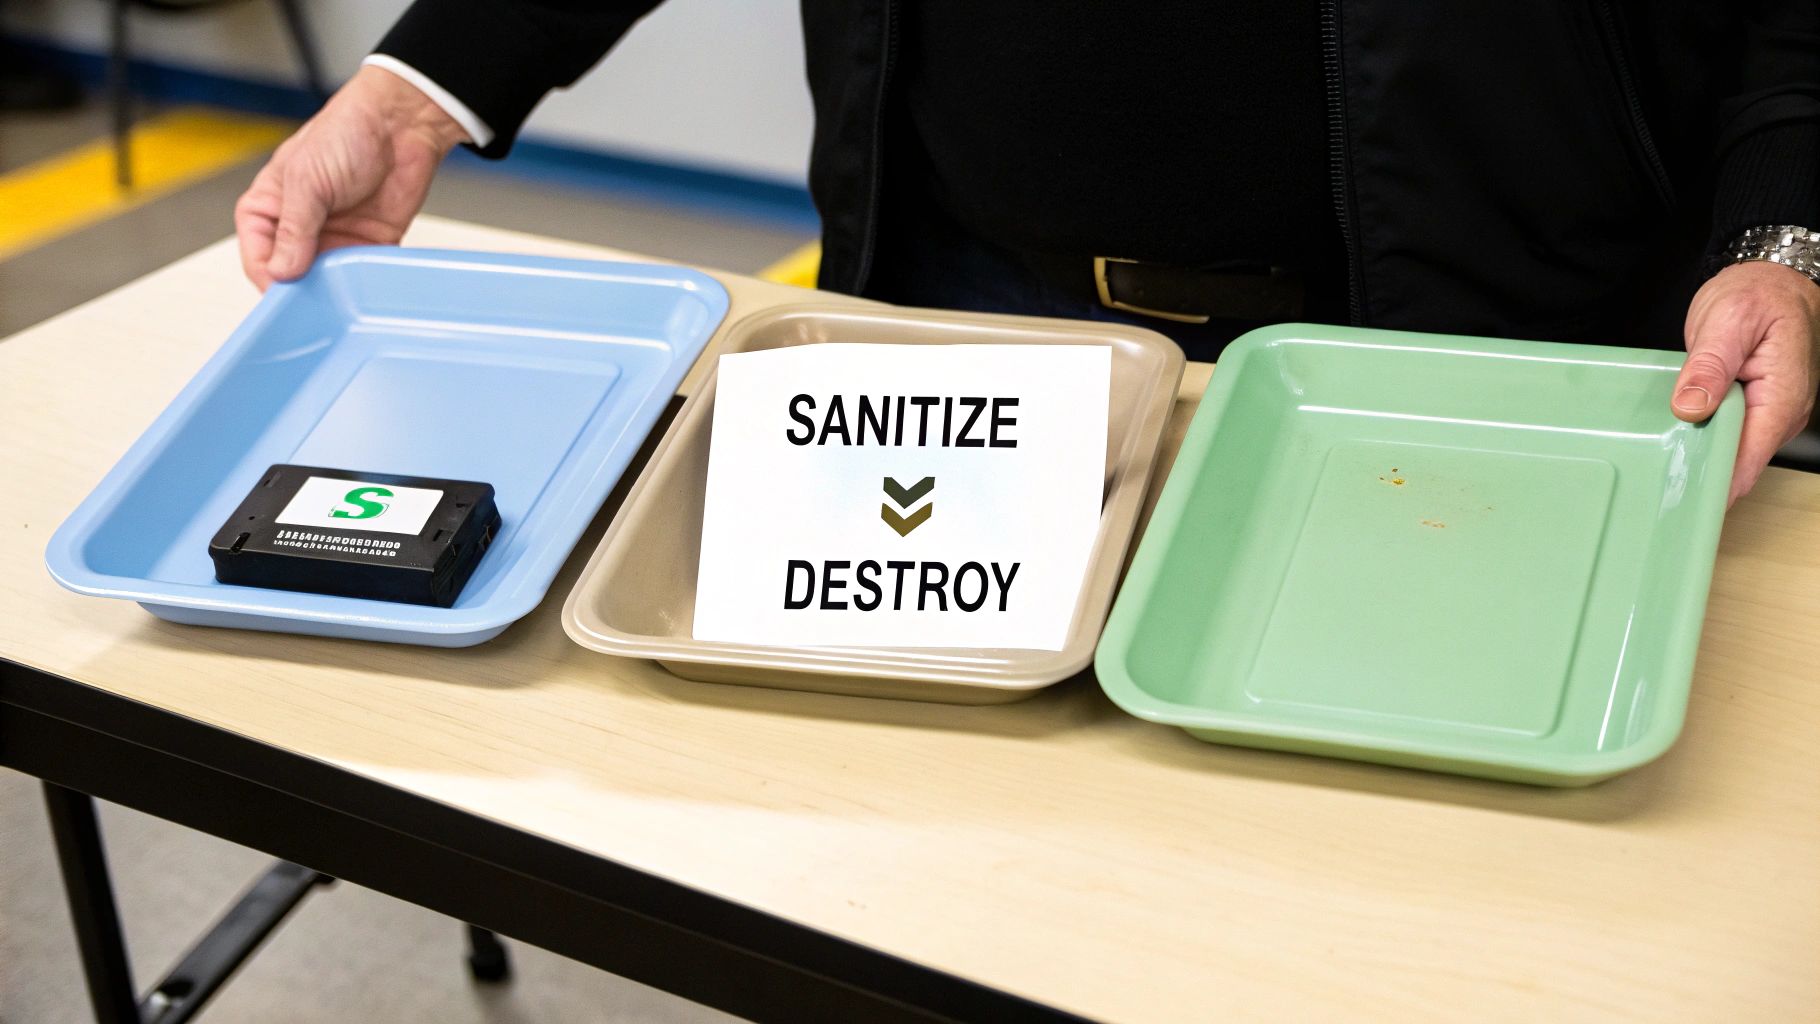
Choosing how to handle an old SSD isn't just a technical detail—it's a critical decision that balances security, cost, and your company's environmental goals. While secure sanitization is an incredibly effective way to wipe SSDs and allow them to be reused, it's not a silver bullet. Some situations are just too high-stakes, and the only path forward is complete physical destruction.
Knowing when to pivot from wiping to shredding is a cornerstone of a smart IT asset disposition (ITAD) strategy. The decision almost always comes down to the drive's condition, the sensitivity of its data, and your organization's ultimate tolerance for risk.
Scenarios Demanding Physical Destruction
There are times when things go wrong, making a successful sanitization impossible to verify or just plain too risky. In these moments, the potential fallout from a data breach is so severe that it makes the hardware's resale value irrelevant. Physical destruction becomes the only guaranteed way to eliminate the data for good.
Here are the clear-cut cases where you should immediately opt for destruction:
- Failed or Damaged Drives: If an SSD is physically damaged or has failed so badly that its controller won't respond, you can't run firmware-level commands like Secure Erase. It's that simple. If you can't talk to the drive, you have zero proof that the sanitization process ever completed.
- Drives with Untrusted Firmware: This is rare, but in high-security environments, there can be legitimate concerns that a drive's firmware has been compromised. If you can't trust the firmware to execute a Secure Erase command properly, you can't trust the wipe.
- End-of-Life Media: SSDs that have hit the wall with an excessive number of write cycles can become unpredictable. Their internal controllers might not behave as expected. Instead of gambling on an incomplete wipe, destruction is the much safer bet.
Zero-Risk Data: For assets holding top-secret government data, proprietary intellectual property, or other information classified at the highest levels, many internal policies make physical destruction the default, non-negotiable standard. The risk of forensic recovery—no matter how small—is simply unacceptable.
The Financial and Environmental Trade-Offs
The "sanitize vs. destroy" decision has a ripple effect. Sanitization is what makes the circular economy in IT possible, allowing perfectly good drives to be resold, reused, or redeployed within your own organization. This approach doesn't just recover value from retired assets; it dramatically cuts down on e-waste and the environmental toll of manufacturing new hardware.
Physical destruction, on the other hand, is the end of the line for an asset. It forfeits any chance of resale value. While the shredded metals can be recycled, the functional component is gone forever. For businesses focused on sustainability, this makes secure sanitization the clear preference whenever it's a viable option.
Working with a partner who gets these nuances is key. For example, a properly R2 certified electronics recycler can guide you through this decision-making process, ensuring you meet both your security and environmental compliance goals.
By creating a clear framework, you can confidently decide when wiping SSDs is enough—and when physical destruction is the only answer.
Your SSD Wiping Questions Answered
When you're in the trenches of IT asset disposition, wiping SSDs brings up some very specific, real-world questions. Let's tackle the most common ones we hear from IT managers to help you dial in your process.
Does ATA Secure Erase Wear Out the Drive
There’s a common concern that firmware-level commands like ATA Secure Erase might cause the same kind of wear and tear as a multi-pass overwrite. Good news—it doesn't.
Unlike overwriting, which repeatedly writes new data to the NAND cells, Secure Erase is much more elegant. It simply applies a targeted voltage spike to reset the cells to their original state. This function is engineered as part of the drive's normal operating parameters and has a negligible impact on its lifespan. It's both safe and highly effective.
What if a Drive Shows a Frozen State
Every now and then, you’ll try to issue an ATA Secure Erase command and get hit with a "frozen" security state. This isn't an error; it's a security feature built into the BIOS/UEFI to stop malware from maliciously erasing your drive.
The fix is usually surprisingly simple: you just need to power cycle the drive. Either perform a hot-swap by unplugging and replugging the drive's power cable (while leaving the data cable connected) or put the computer to sleep and wake it back up. This suspend-resume cycle almost always unfreezes the drive, allowing you to proceed.
Can You Recover Data After a Cryptographic Erase
In a word: no. Data recovery after a properly executed Cryptographic Erase is considered computationally impossible.
This method is so definitive because it doesn't actually touch the user data. Instead, it destroys the one-of-a-kind AES-256 encryption key stored on the drive's controller. Without that key, the terabytes of data on the drive are instantly transformed into an indecipherable block of random ciphertext. It’s the digital equivalent of melting the only key to an impenetrable vault.
When your organization needs certified, fully documented, and compliant data destruction for SSDs, trust the experts. Dallas Fortworth Computer Recycling provides nationwide services to ensure your data is handled securely from start to finish. Learn more about our certified data destruction services.